6.09.2010

A chocolate chip thank you


Gus the Wonder Dog?

Um, no. Not always. I love my silly noodle dog, and he's generally well-behaved, but sometimes... Sometimes he's not. Gus' primary offense is choosing to ignore me when I tell him to come. 4 out of 5 times he's on target, returning to me for the treats I keep in my pockets. But there's that 20 percent chance he's going to find something better, more interesting than me. Something stinky and smelly, maybe even dead and edible. Then all bets are off.

I let Gus off leash the other night to play with some neighborhood dogs, and yes, he ran away. There was no returning when I called — it was into the woods at a gallop, me calling his name and commanding him to come, empty leash in hand. Fantastic. I walked through poison ivy infested woods, across my neighborhood, and into the adjoining development, searching for a black and tan mutt with a red collar — and getting angrier by the minute. I wondered if I should give up and go home. Or at least go home and get the car rather than hoofing it.

Then I heard someone calling my name. It was nice neighbor Steve, who'd captured Gus and put him inside his house along with his two dogs.

How much do I love Steve for this? Enough to go beyond a word of thanks, and what says thank you better than a batch of homemade chocolate chip cookies?

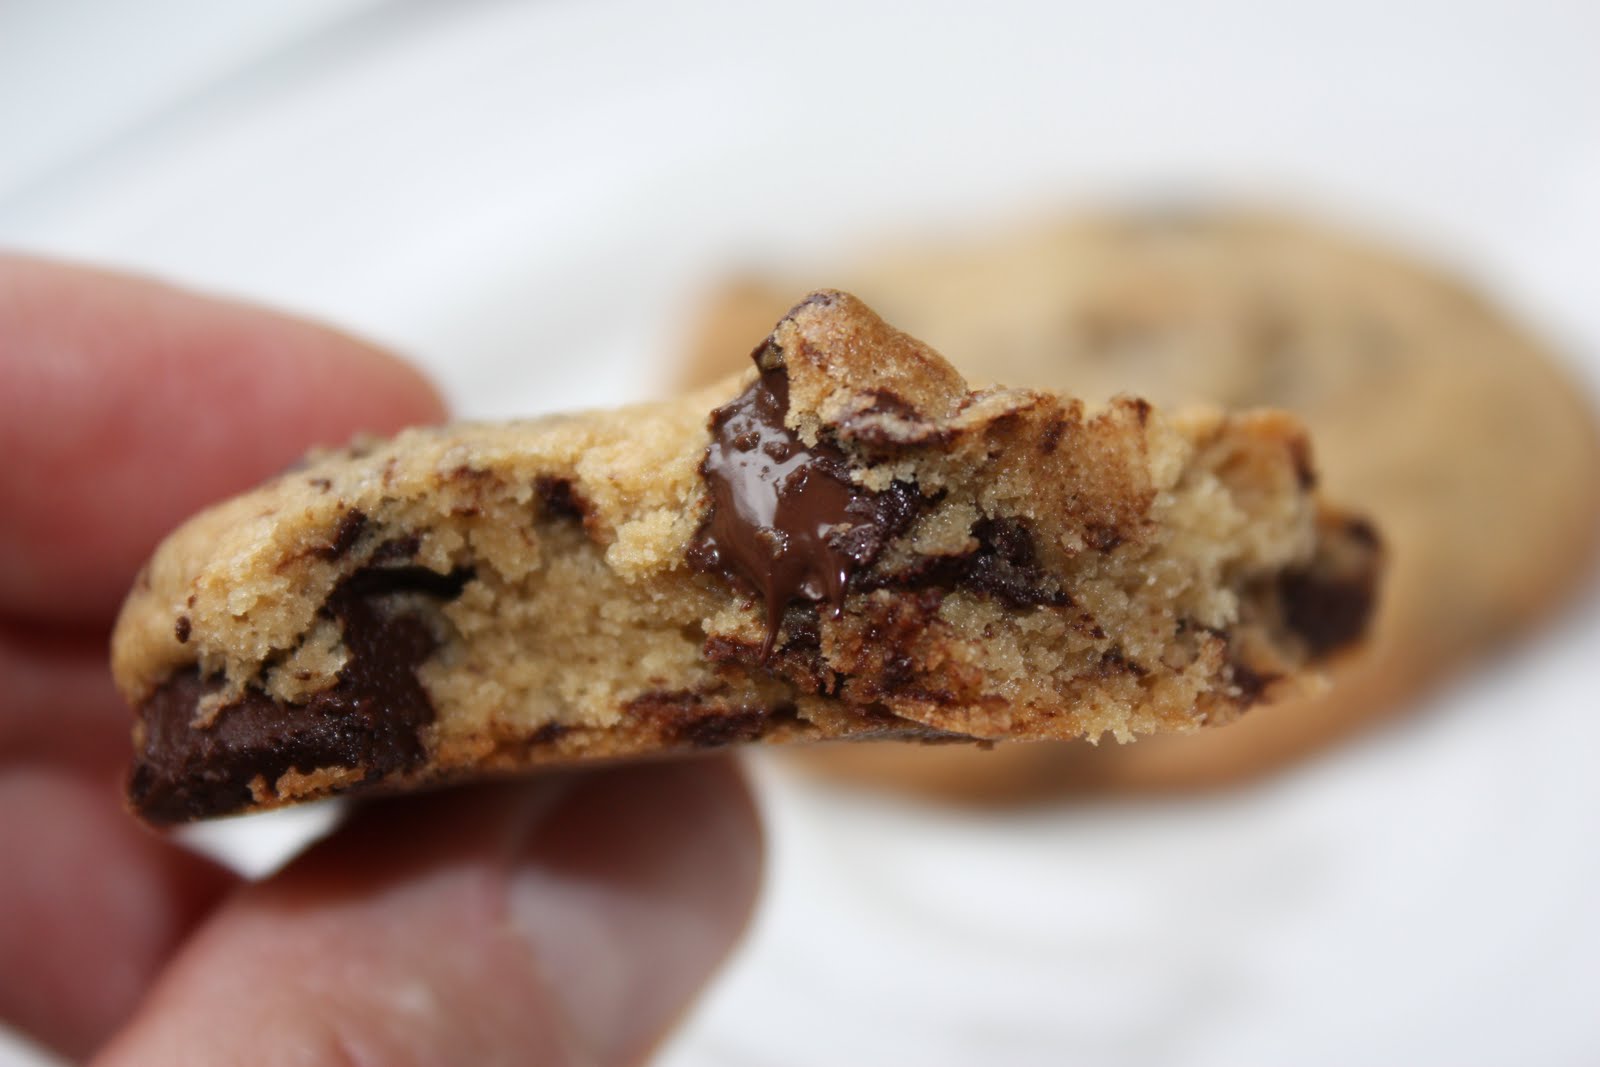
My chocolate chip cookie recipe has evolved over time — it's Nestle Toll House ramped up. Best enjoyed right out of the oven, these cookies are chewy inside and crunchy outside. I use more (dark) brown sugar than granulated sugar, which gives them a deeper flavor. I also skip the semi-sweet morsels and replace them with a high-quality bittersweet chocolate chopped into chunks. Callebaut brand stays in my pantry — it's a nice chocolate that doesn't break the bank.


Chocolate Chip Cookies
Makes about 36 cookies

2 1/3 cups all-purpose flour
1 teaspoon baking soda
1 teaspoon kosher salt
2 sticks (1/2 pound) butter, softened
1 1/4 cup dark brown sugar, packed
1/2 cup granulated sugar
2 large eggs
1 teaspoon pure vanilla extract
12 ounces bittersweet chocolate, cut into chunks

Preheat the oven to 350 degrees Fahrenheit and position racks in the center. Line baking sheets with parchment paper and set aside.

Sift the flour and baking soda together; add the kosher salt and stir with a whisk to combine.

In a heavy-duty mixer fitted with the paddle attachment, cream the butter and sugars together on medium-high speed for a solid 5 minutes, until light and fluffy. Scrape the sides and bottom of the bowl, then add the eggs one at a time, scraping again after each addition. Be certain they are completely incorporated into the dough. Add the vanilla and mix again.

Add the flour mixture with the mixer on low speed, then add the chocolate chunks. Remove the bowl from the mixer and fold by hand to be sure all the ingredients are evenly mixed in.

Drop the dough on the parchment-lined baking sheets in 2 tablespoon increments. The cookies will spread a little as they cook  — I put 9 or 10 cookies on a sheet tray. Bake for 11-12 minutes, rotating pans once while they bake.

Cool the cookies on cooling racks, and bake the remaining dough as above. These cookies will keep for 3 days in an airtight container.

6.07.2010

Clam roast for one


Firing up the oven this weekend didn't seem like a good idea. Temperatures hovered in the low 90s, my air conditioner hummed constantly, and neither the dog nor I could walk far without panting. I wanted to stay on the couch with a book and a tall glass of ice water. But I had clams — perfectly shaped, off-the-boat fresh,  hard-shelled clams — and I wanted, needed, just had to roast them. Even if it meant roasting a little bit, myself.

I must thank my friend Lisa for the clam bounty. Smart, personable, and open-minded, Lisa is up for most anything. Except bivalve mollusks. I'm sad for her, but it worked to my advantage. Lisa is a member of Walking Fish, a community-supported fishery (CSF), based on the community-supported agriculture (CSA) model. Each week she picks up her share of seafood, freshly delivered from the North Carolina coast. This week's delivery included the dreaded clam, which I was happy to take off her hands. Roasted in a cast iron skillet with potato, onion, garlic and tomato, clams make a perfect meal — simple, easy, and straightforward, but most importantly, delicious.

My former employer, chef Jody Adams, is the genius behind this dish.  I learned a tremendous amount about all things food when I cooked at Rialto years ago, but working with New England fish and shellfish in Jody's kitchen was especially enlightening. I grew up in a less-than-adventurous family. Seafood didn't make it to our land-locked dinner table, so there was a lot to absorb on the job. Jody's clear, clean flavors and beautifully balanced palate are exemplified in this dish, published in the Gourmet Today cookbook. It's a perfect meal for the home cook.

In typical Lynn fashion, I didn't have all of the required ingredients on hand and wasn't willing to make another trip to the grocery to procure them. I substituted grape tomatoes for plum tomatoes, adding them later in the cooking process than described to make up for their small size. I had far fewer clams than called for in the original recipe, and made adjustments accordingly. Also, I'm a huge garlic fan, so the quantity listed below isn't on par with Jody's recipe — but it made for incredible snacking. I hope you'll try it.


Cast-Iron Roasted Clams
Adapted from Gourmet Today
Serves 1-2

2 medium red potatoes, sliced into 1/4-inch thick half moons
1/2 of 1 large red onion, cut into 1/4-inch thick wedges, root ends intact
10 cloves of garlic, peeled
scant 1/4 cup extra-virgin olive oil
1/2 teaspoon kosher salt
freshly ground black pepper
1 1/4 pounds small hard-shelled clams, scrubbed
1 cup cherry tomatoes, cut in half
1/4 teaspoon hot red pepper flakes
1 tablespoon parsley, chopped

Place a rack in the center of the oven and heat to 500 degrees Fahrenheit.

Toss the potatoes, onions and garlic in olive oil and season with salt and pepper. Place them in a large cast-iron skillet (10-12 inches is fine for this number of clams) and roast for 15 minutes. Add the scrubbed clams to the pan and cover with a lid or a piece of foil. Continue to roast for another 8 minutes. Add the halved cherry tomatoes to the pan and roast another 3-4 minutes, covered.

Remove the skillet from the oven and check to see that all of the clams are open. Discard any that remain closed. Add hot red pepper flakes, toss to combine, and sprinkle with chopped parsley.

6.05.2010

The beans have arrived


The beans arrived! Twelve pounds of heirloom bean fabulousness was waiting on my doorstep when I returned home from work Tuesday evening. It was the highlight of my week.

"What beans?" you may be asking. The beans I've been meaning to write about for a while, but haven't found time. Now is the time.

I went out to dinner for with the vivacious Caroline a few weeks ago. We met at Poole's Diner, one of my favorite Raleigh restaurants. It's hip, it's happenin', it's downtown. It really was a diner in its former life, complete with tin ceilings and a Formica-clad bar saved in the renovation. Chef/owner Ashley Christensen serves local, seasonal, hand-crafted food at Poole's, usually of French or Italian pedigree, sometimes with a Southern twist. The Grand Marnier-spiked chicken liver pate is to die for.

I have worked in a few nice restaurants and I understand the special touches they offer, but this woman churns her own butter. Churns butter! Takes the term housemade to a new level.

Caroline and I enjoyed deviled egg salad and fried green tomatoes with roasted tomato relish; a lovely frisee salad with asparagus, poached egg, bacon cornbread croutons, and Banyuls vinaigrette; North Carolina soft shell crab on Rancho Gordo Good Mother Stallard Beans; and a Royale with Cheese (I love a good Pulp Fiction menu reference).

Everything was good, but my soft shell crab was the hands-down winner. Yes, the crab was lovely — a seasonal crustacean crisped to perfection and lightly sauced with a bit of aioli. But those beans. The beans! They were amazing. Rich, earthy, and melt-in-your-mouth fantastic. These are the beans I've been looking for.

I've read about Rancho Gordo for years —  it's made the pages of The New York Times, Saveur, Gourmet (R.I.P.), Bon Appetit, and The San Francisco Chronicle. Founder Steve Sando raises heirloom beans and seeds in California's Napa Valley, and ships his products internationally, and though I'd visited the company website several times in years past, I never made a purchase. After my meal at Poole's I marched forward to my trusty Mac G5, credit card in hand, and bought dried beans online. Many, many, many dried beans. With a flat $8.00 shipping rate, why buy one little bag? Stock up. Branch out. My pantry now holds 9 varieties of beans I've never heard of.

Dear reader, you are in for many a bean recipe. One pound of Good Mother Stallards sit submerged in water, waiting to be unleashed this weekend.

If you visit Poole's — and if you're in Raleigh, North Carolina, you must put it on your To Do List — know that reservations aren't accepted. Be prepared to wait. The charming tin ceiling is lovely to look at but doesn't help the noise factor. I've had to wait a little longer than I'd like for food in the past, though that wasn't the case on my most recent visit (do remember that everything is made to order). Oh, and you won't be given a menu. Several chalk boards hung on walls list the evening's selections, so you may have to get up and walk across the room to see your options. 

You should go. No doubt. The food is consistently terrific.

6.03.2010

Green 'maters


I fell for the green tomatoes. Perched next to their red hothouse relations on a vendor's table, firm, somewhat tart, and close to the color of lime, they called out to me. Green tomatoes are often available in late spring or early summer in North Carolina, and again in late fall, when farmers and gardeners harvest the unripened fruit before it can be damaged by frost. At the height of summer, vine ripened beauties take over, so you buy green tomatoes when you see them, like I did at the farmer's market Sunday afternoon.

Driving home after a great evening with friends, I pulled into the Piedmont Triad Farmers' Market for a quick look around. Green tomatoes (and a few peaches) caught my eye, and I returned to Chapel Hill with visions of fried green tomatoes, green tomato relish, and green tomato pie. In the end, I made none of those. Instead I opted for pickled green tomatoes.

I'll pickle just about anything. Pickled turnips, pickled okra, pickled pumpkin — something is ready any time of year for pickling. I adore the crisp zing and complex flavor pickles provide. They can be sweet, sour, spicy, curried. Imagination takes over, and it's great fun to experiment. I went with a quick refrigerator pickle this time. Unlike their canned counterparts, quick pickles last only a couple of weeks chilled (there's no sterilizing of jars, no boiling-water processing), but it's easy to go through a small batch. They're terrific snacks and incredible counterparts to grilled meats. Give me a pickle platter any day.

I improvised this recipe. Feel free to adjust ingredients or add new ones to taste. Adding a hint of sugar, as I did, isn't required, but I think it evens out the flavor. If you don't like your pickles spicy, skip the hot red pepper flakes. Add celery seed or coriander — experiment.

If you don't have green tomatoes, try onions, young turnips or daikon this time of year. For a classic dill pickle flavor, use a handful of dill fronds and leave out the sugar, mustard seed and bay leaves.


Green Tomato Pickles
This makes enough brine for 2 pounds of vegetables

2 pounds green tomatoes, cut into 1/2-inch wedges

6 cups water
1 cup white wine vinegar
1/4 cup kosher salt
1 tablespoon sugar
1/4 teaspoon hot red pepper flakes or 2 dried red chile peppers
1 tablespoon whole black peppercorns
6 garlic cloves, smashed
2 bay leaves
1 teaspoon yellow mustard seeds
several sprigs of fresh thyme

Cut the green tomatoes into 1/2-inch wedges and place in a heatproof container, like Pyrex.

Combine the remaining ingredients in a large saucepan or pot and bring to a boil. Reduce the heat and simmer for 5 minutes. Pour over the prepared tomatoes in a heatproof container. Cool to room temperature (about 1 1/2 hours), cover, and refrigerate in a non-reactive container.

These pickles must be stored in the refrigerator and will last about 2 weeks.

6.02.2010

Bring on the ribs


You only have one chance to make a first impression. Keep that in mind the next time you eat with strangers.

I went a dinner party hosted by my friends Karen and Crystal this past Saturday. They live about an hour-and-a-half from me, and the other guests were local. I was excited about helping with hors d'oeuvres, spending time with my old friends, and the opportunity to make new ones. I packed a bag, sent Gus the Wonder Dog to overnight camp, and hit the road.

Karen and Crystal planned a very seasonal menu, perfect for Memorial Day weekend (the unofficial start of summer, marked by the opening of swimming pools, men in seersucker, and increasingly hot temperatures). We had corn and red onion salad with basil, fantastically flavorful baby back ribs, and sauteed asparagus. A pound cake garnished with lemon curd and berries rounded out the meal. It was summer on a plate.

Maybe I enjoyed everything a little too much. In my enthusiasm, I managed to dribble rib sauce down my shirt. Onto my right breast. Nice! After a little grief from another dinner guest — she borrowed my camera and documented the stain — I marched upstairs to my suitcase, found another t-shirt, and quickly changed.

Rubbed with dry spices and allowed to sit overnight before spending a long time in a low oven, the ribs were tender and delicious. The kind of ribs that get a person (me) into trouble. Crystal graciously shared her recipe, a riff on Alton Brown's. Be careful: wolfing down ribs too quickly could result in stained clothing.


Crystal's Baby Back Ribs
Adapted from Alton Brown

Use for 3 racks of pork ribs. 

Dry rub:
2 cups light brown sugar
1/4 cup chile powder
1/8 cup chipolte chile powder
1 tablespoon cinnamon
1 tablespoon cardamom
1/8 cup cumin
1/8 cup smoked paprika
close to 1/4 cup Italian seasoning
1/8 cup thyme
1 tablespoon onion powder
1/3 cup kosher salt

Glaze:
1 cup white wine
2 tablespoons white wine vinegar
2 tablespoons honey
2 garlic, minced
2 tablespoons Worcestershire sauce

Preheat the oven to 225 degrees Fahrenheit.

Combine all of the dry rub ingredients and mix thoroughly. Spread the rub evenly on the ribs — the coating will be fairly thick, though this recipe makes enough for more than one batch. Wrap the ribs in heavy aluminum foil, shiny side out, and marinate at least one hour (Crystal's ribs marinated overnight) in the refrigerator.

Combine all of the glaze ingredients in a microwave safe bowl and heat on high power for 1 minute. If nuking isn't a option, combine everything in a small saucepan and heat until the honey dissolves.

Remove the ribs from the refrigerator but keep them wrapped in foil. Place them on a jelly roll pan and cover with the glaze. Bake at 225 degrees Fahrenheit for 2 1/2 hours. To test if the ribs are done, twist them in the center — if the middle ribs turn easily, they're ready.

Take the foil packages from the oven and pour the liquid contents into a medium saucepan or skillet. This is most easily accomplished by snipping off one end of foil. Bring the liquid to a boil and cook for a minute or two, reducing to sauce consistency. Brush the glaze onto the ribs and broil until caramelized. Slice the rib slabs into 2 bone portions, place in a bowl, and toss with the remaining glaze.

Devour.

5.31.2010

Peaches and prosciutto


A box of ripe, juicy, slightly bruised peaches saved me.

I met my friends Karen and Crystal at the Piedmont Triad Farmers' Market in Greensboro, North Carolina Saturday afternoon. They were hosting a dinner party that night, and I was in charge of hors d'oeuvres. (Really good) deviled eggs were already on ice in the car, but I knew I needed another offering. Velvety prosciutto slices were also on hand (I grabbed them from the fridge that morning as I packed), but I wasn't happy with the standard melon-prosciutto pairing I'd planned. It's a classic, winning combination, but it felt too safe, a bit boring. While Karen and Crystal searched for flowers, I sought inspiration. I found it in a "fresh peaches" banner.

The rosy fruits on display were lovely but very firm, the kind that sit on the counter at room temperature for a few days before they're fit for consumption. Dinner was in 5 hours. I asked if any riper peaches were available, and the vendor waved me around the table, into the booth. "You can take as many of those as you'd like for three dollars," she said, gesturing to a box under the table. Succulent and slightly battered, those peaches weren't considered suitable for sale. I filled my bag quickly and knew exactly what would become of them.

Guests in attendance and deviled eggs on display, Crystal lit the grill while I tried to master the over-sized tongs I had to work with. I grilled the peaches — sliced, brushed with melted butter, and dusted with sugar — until they were lightly charred and soft. Piled high on a platter and tossed with balsamic vinegar, everything sprinkled with freshly chopped mint...  I was satisfied. The salt and fat of the prosciutto is a perfect foil to sweet fruit, balsamic vinegar provides zing, and mint adds a fresh dimension.

Ideally you'll have ripe but firm fruit to work with if you opt to grill them — extremely ripe peaches will turn to mush. Wash peaches and remove any bruised areas with a knife prior to grilling.

5.27.2010

Radicchio challenge


I drove home yesterday under a gorgeous Carolina blue sky (the kind of sky that makes you want a convertible), fresh CSA produce and lovable dog at my side, contemplating my new mission: convincing Cathy that radicchio is wonderful.

Being single, I don't need a huge box of veggies each week; as a single mother of a soon-to-be-2-year-old, my friend Cathy doesn't either. We agreed to split a half-share of Bluebird Meadows' vegetables this season, which arrive each Wednesday afternoon. So far, so good.

We split most things down the middle — as of yesterday we each have 6 beautiful carrots, for example, still dusted with soil, greens attached. If it makes more sense not to share an item, we negotiate. Cathy kept the small head of cauliflower, and I went home with a head of radicchio. We (she) reached a decision after I told Cathy to try a bite, as radicchio was unfamiliar.

I prepped her for the first taste. I explained that radicchio is on the bitter side, that I think of it as a perfect winter-y salad component mixed with other chicories, like Belgian endive. I told Cathy that radicchio is great, because it is. After that first taste she insisted that she keep the cauliflower and that I return home with the radicchio. Mission established.

Slightly astringent raw, radicchio's character changes when cooked. In the summer, I'm most likely to toss radicchio wedges with salt, freshly ground black pepper, and olive oil, then throw it on the grill. I drizzle the lightly charred leaves with balsamic vinegar and serve it alongside steak or pork, or (even better) add it to risotto. Last night I used it on pizza — grilled radicchio, ricotta, and pancetta pizza. I hope this recipe will persuade Cathy to keep the radicchio next time.

The topping combination is mine, but I must thank chefs Johanne Killeen and George Germon for their terrific grilled pizza dough recipe. Germon is credited with inventing grilled pizza at their award-winning restaurant, Al Forno. I use cornmeal in my dough (Germon recommends johnnycake meal, which is widely available in his home state of Rhode Island), but he lists cornmeal as a substitute.

For those who don't consume pork: skip the ricotta. Throw a red bell pepper or two on the grill with the radicchio, and char. Let the blackened peppers steam in a bowl covered with plastic wrap, allow to cool, then peel. Cut the pepper into strips, season, and toss with balsamic vinegar. Proceed with the following recipe, the roasted red pepper and grated Parmesan in place of pancetta and ricotta (put the Parmesan on top of the other ingredients, rather than the bottom).


Grilled Pizza with Radicchio, Ricotta, and Pancetta
Serves 1-2

Grilled Pizza Dough
Adapted from Cucina Simpatica
Makes enough dough for four 12-inch pieces, about 24 ounces total

1 envelope (2 1/2 teaspoons) active dry yeast
1 cup warm water
pinch sugar
2 1/4 teaspoons kosher salt
1/4 cup finely ground cornmeal
3 tablespoons whole-wheat flour
1 tablespoon olive oil
2 1/2 to 3 1/2 cups unbleached all-purpose flour

Combine the yeast, warm water and sugar in a large bowl, stirring to dissolve the solids. Let it sit for 5 minutes, then add the salt, cornmeal, whole-wheat flour and oil. Add the white flour 1/2 cup at a time, stirring to combine and create a stiff yet pliable dough (you may not need all 3 1/2 cups of flour). Turn the dough onto a lightly floured surface and knead for about 8 minutes. Add only enough flour to keep the dough from sticking to the work surface.

When the dough is smooth, put it in a bowl lightly greased with olive oil and turn it over in the bowl, coating the entire surface. Cover the bowl with plastic wrap and let the dough rise until doubled, about 1 1/2 hours.

Remove the dough from the bowl, punch it down, and knead again for a couple of minutes. Allow it to rise a second time, for about 40 minutes. After the second rise, it's ready to be used.

Punch down again and divide into 4 balls. Each will make a 12-inch pizza serving 4 as an appetizer or 1-2 as a main course. This dough freezes well for about 2 months.

Pizza Toppings
Enough for 2 pizzas

1 small head radicchio, cut into wedges
4 thin slices pancetta
a heaping 1/3 cup ricotta cheese
1 shallot, minced
2 garlic cloves, minced
kosher salt
freshly ground black pepper
extra virgin olive oil
balsamic vinegar
3 tablespoons parsley, chopped

Cut the radicchio into wedges. (I sliced the head in half, then cut each half into quarters). Keep the core intact, as it makes it easier to grill. Brush with olive oil, season, and grill until lightly charred, 4-5 minutes. Remove from the grill, cut the leaves from the core, and toss them with a balsamic vinegar to taste, about 2 teaspoons. Add salt and pepper as necessary.

Grill the pancetta slices for 2-3 minutes, until it begins to curl and crisp. Remove from the grill and break into pieces.

Place the ricotta cheese in a small bowl. Add the minced garlic and shallot (if you're sensitive to raw onion, you can cook the them in a little olive oil on low heat until soft, then add to the cheese). Season with salt and freshly ground pepper. Stir to combine.

When it's time to make pizza, bring your toppings to the grill on a tray. You will need a small ramekin containing a few spoonfuls of olive oil, a pastry brush, and tongs.

Germon insists that only a wood or charcoal grill will work for grilled pizza, as gas grills don't get hot enough for his liking. I've had success on a gas grill, and if it's what you have, please, grill pizza!  I prefer the flavor charcoal adds, but gas grills are less labor intensive.

Build a fire on one side of a kettle grill — you want one side as hot as possible, the other a bit cooler to avoid burning the crust while the toppings cook. If using a gas grill, set one side on high, the other on a medium-to-low setting.

Stretch or roll the dough into a 10 to 12-inch circle (irregular shapes are fine; mine was a warped rectangle). Place it on a cookie sheet and brush with olive oil. Flip the dough onto the hottest part of the grill and allow it to puff up for a few seconds (longer if using a gas grill). Then flip the crust over with tongs and move it to the cooler side.

Brush this side of the dough with olive oil. Spread the ricotta mixture thinly across the pizza's surface. Scatter the grilled, dressed radicchio leaves and pancetta pieces on top. Cook for about 8 minutes. Remove to a cutting board, sprinkle with chopped parsley and cut into wedges.

5.25.2010

Another standby — asparagus, poached egg and parm


Gray skies continue to bring rain in intermittent showers, my work schedule is a bit wonky, and the ant battle rages on (though I seem to be winning). I am tired. Too tired to shop, too tired to go out. It's another make-do-with-what's-in-the-refrigerator post.

A quick review of the the aforementioned refrigerator led to one of my favorite standby meals — Asparagus with Poached Egg and Parmesan. The lusciousness of the egg yolk (it creates a sauce of sorts) makes this dish feel special, though it takes very little time to prepare. This is a lovely appetizer for a large dinner, but I think it's the perfect size for a late-night meal at home.


Asparagus with Poached Egg and Parmesan
Serves 1

Cook a handful of asparagus using your favorite method. Tonight, I opted for steaming, but roasting is always good. Grilling works, too.

While the asparagus is cooking, bring a shallow pot of water to the boil and reduce to a simmer. Add a pinch of salt and a splash of white vinegar. Crack one egg into a ramekin or tea cup. Stir the water to create flow in one direction (think whirlpool), then ease the cracked egg into it. Give the water a gentle stir in the same direction — your egg will be done in about 3-4 minutes. Don't be alarmed if any white strands trail away from the yolk (this is more likely to happen with older eggs). You can trim any ghostly appendages that may have formed with a sharp knife or scissors, making it more acceptable for plating, but I don't worry about this when I'm cooking for myself.

Put the cooked asparagus on your favorite plate, and place the poached egg on top. Season with salt and freshly ground black pepper, and cover with shaved Parmesan. Drizzle with a nice extra virgin olive oil.

Try not to inhale too quickly. 

5.23.2010

Summer squash begins


My weekend revolved around thunderstorms.

Much-needed rain rolled through Chapel Hill in waves, sometimes accompanied by flashes of lightning and booming thunder. Occasionally it rained when the sun was shining. The air was heavy with moisture, steam sometimes rose from the pavement, and I tried desperately to gauge whether the dog and I could make it through the neighborhood without getting drenched in an unexpected shower. Eyes cast skyward, I kept our jaunts short and tried to remember the umbrella.

More time indoors meant there was no escaping household chores (laundry! vacuuming!); I enjoyed a fabulous dinner at Poole's Diner with the always effervescent Caroline (more on that later); and there was plenty of opportunity to ponder the summer squash that arrived in last week's CSA box. I'm worried that lots of squash mid-May means an onslaught come July and August, but I put a positive spin on it, beginning with one of my favorites summer staples — a curried yellow squash soup. Prepare yourself for a plethora of squash recipes if my concerns are well-founded.

Bluebird Meadows (the farm that supplies my weekly box-o-produce) plants several varieties of summer squash — crookneck, lemon zephyr and pattypan all made it into the soup pot. Pattypan are the pretty flying saucer-shaped squash you're more likely to find at a farmers' market than a typical grocery. I think they're more flavorful than other varieties, and if you find baby pattypan, you can leave them whole and delight dinner guests. Is it wrong to describe them as cute? Lemon zephyrs are straight and narrow with green tipped ends; crooknecks earn their name honestly.

Despite the ants (who are dwindling in number but still present), I ventured into the kitchen, put my favorite soup pot on a burner, and began chopping.

A few tips for this soup: as always, use the freshest produce you can find; vegetable stock would be an ideal substitute for water, but chicken stock would be too heavy and take over, so please avoid; grind your spices in a spice grinder or coffee mill set aside only for spices; salt throughout the cooking process — I'm a big believer in pulling out layers of flavor, so season and taste as you go.

I'm off to enjoy soup and salad for supper while watching the much-hyped LOST finale — a series that started strong and has ended in a muddled mess, but I have to see it through to the end. I adore Terry O'Quinn.


Spiced Summer Squash Soup
Serves 4 - 6

4 tablespoons unsalted butter
1 large onion, chopped
3 garlic cloves, minced
2 tablespoons fresh ginger, minced
about 1 1/2 pounds yellow summer squash (pattypan, lemon zephyr, crookneck)
1 1/2 teaspoons coriander seeds
1 1/2 teaspoons cumin seeds
5 cardamom pods, husked — use only the seeds
1/2 teaspoon cayenne pepper
1/2 teaspoon turmeric
5 1/2 cups of water or vegetable stock
kosher salt to taste
1/2 cup cream
 a pinch of parsley and cilantro leaves, finely chopped, to garnish

Heat the butter over medium low flame. Add onion and garlic and cook until soft, about 4-5 minutes.

Grind the dried spices in a spice mill or coffee mill until fine.

Add minced ginger, chopped yellow summer squash, ground spices, turmeric and cayenne to the soup pot and stir. Cook for another 5-10 minutes over medium heat, covered. Add water or vegetable stock and simmer for roughly 20 minutes. Season to taste, puree in a blender (standing or immersion) and add cream. Garnish with parsley and/or cilantro to serve.

5.21.2010

Ant battle


I haven't cooked anything for the last two days. Not on the stovetop or in the oven anyway. My meals are all raw, all the time.

Tiny black ants invaded my kitchen this week, trailing down a windowsill, scurrying around the laminate counters, making their way to the stovetop. The stovetop! Ack.

Proud of my neat and tidy home, I took their presence personally. I scrubbed the kitchen from top to bottom and set the oven dial to clean, hoping to roast any unwanted insects that might be lurking within. I also asked for help. Friends consoled me, told me that even a clean home was subject to invasion, but I was despondent, disgusted, at wit's end. Then the lovely Kathleen recommended a product that wouldn't poison me or the dog, and promised it would make the ants disappear within 2 days. I hit the hardware store, bought the aforementioned ant killer, set up sticky little goo traps, and hoped for the best.

Waiting for the magic ant killer to work, I couldn't stand being in the kitchen. The ants were still there, getting themselves acquainted with the goo. And I had to allow them to live, to carry the sticky mess back to their nest and share it with friends.

Watching them gave me the heebie-jeebies.

So I set up shop in the dining room. The table became a temporary (very low) counter top. I brought in my knives, cutting board, bowls, and whisks, pretending the ants didn't exist.

I focused my thoughts on an Asian coleslaw instead, using some of the contents of this week's CSA box: fennel, green cabbage, and snow peas. The CSA newsletter recommended a coleslaw made with mayonnaise, and though I'm sure it's good, I wanted something lighter, cleaner, with the nuttiness toasted sesame oil provides and the crunch of roasted peanuts. The following recipe was made with what was on hand, no stovetop or oven needed.

Cross your fingers and hope that the evil ants disappear tomorrow.


Asian Slaw
Serves 3-4 as a side dish

1/2 small head green cabbage, thinly sliced
1 fennel bulb, thinly sliced
1 red bell pepper, julienned
2 cups snow peas, julienned

3 - 4 tablespoons soy sauce
juice of 1/2 of a lime
2 tablespoons of ginger, minced
pinch of sugar
1 tablespoon toasted sesame oil
1/3 cup canola oil, or other neutral vegetable oil
kosher salt and freshly ground black pepper to taste

1/2 cup crushed roasted peanuts (I like the lesser-salt variety, if available)

Clean and cut vegetables, removing the core and ribs from cabbage. Remove the core of the fennel bulb before slicing. Toss to combine.

Put the soy sauce, lime juice, minced ginger, and a pinch of sugar into a small bowl. Drizzle the toasted sesame oil and canola oil in while whisking, creating an emulsion. Taste, and add salt and freshly ground black pepper as needed. Be sure to coat the vegetables in a small amounts of dressing, tossing and tasting, as you go. Garnish with chopped roasted peanuts.


5.20.2010

Radish inspiration


Radishes dominate the farmers' market each spring, and this year is no exception. Stacked high in almost every stall, in colors ranging from red to pink to white, they are hard to escape. But who would want to?


Bright and peppery, radishes are delicious all season, most often julienned and added to salads  — I find they're prettier and easier to eat when cut into tiny slivers. Thinly sliced, placed atop buttered bread, and sprinkled with salt, radishes make a favorite late night snack.


Last night I was leafing through Amanda Hesser's Cooking for Mr. Latte, and the phrase "braised radishes with mint" caught my eye. There was no recipe, but I couldn't stop thinking about it. Braised lamb, braised pork, sure, but braised radishes with mint? Time to experiment. I put down the book and went into the kitchen.


Armed with my favorite chef's knife, Johnny Cash on the iPod, and fresh mint from my back porch, I was good to go.


This recipe would work without the shallot, but I put shallots, garlic or onion in just about everything. Shallots are the onion's mild-mannered, more polite cousin — their subtleties are a perfect fit for this dish. I deglazed the pan with champagne vinegar, giving the radishes a slightly pickled taste. If you don't like vinegar's zing, saute the radishes in butter and add only water to the pan.


The (pretty tasty) result of my efforts follows. This would be a great companion to grilled or roasted poultry or pork.

Braised Radishes with Mint
Serves 2-3 as a side dish


1 very large shallot, minced
1 tablespoon of olive oil
1 large bunch of radishes, cut in half, quartered if large
2-3 tablespoons champagne vinegar
3 tablespoons water
about 2 tablespoons of fresh mint, finely chopped


Heat the olive oil in a large skillet or saute pan. Add the minced shallot, a pinch of Kosher salt, and cook over medium-low heat until soft, 3-4 minutes. Turn up the heat a notch and add the radishes, cooking until lightly colored. Add the champagne vinegar and water, then cover the pan and cook on medium-low heat until the radishes are almost tender, about 12 minutes. Remove the lid and reduce any remaining liquid to a glaze. Shut off the heat and sprinkle with finely chopped mint. Season with salt and pepper to taste.

5.18.2010

A bum rap


Party planning recently took over both my brain and this blog. I neglected to talk about last week's CSA box, which included... collard greens!


Collard greens are assertive, but I think they get a bum rap. People assume they don't like collards based on reputation, without ever tasting them. It doesn't get much worse than that, does it?


Sadly, my parents are anti-collards. Hailing from the Deep South, one might expect them to embrace this green. They don't. Turnip and mustard greens are welcome in their home, but my father's face wrinkles when he describes collards. These are very serious wrinkles — everything furrows and folds. Even his tone of voice changes. The smell of long-cooked collards seems to be a major stumbling block for my father. I think their scent betrays wholesomeness and the earthy flavor to come.

Ronnie's Country Store in Winston-Salem, North Carolina supplied the country ham for this week's recipe. Ronnie's is my mother's favorite stop when she's downtown. Joy swings by and checks out the fresh produce, which is displayed in boxes on the street and inside. She often picks up candy for her grandsons. And she keeps an eye on the country ham scraps. There's rarely a need for a full country ham in our family, but Ronnie's sells trimmings for a reasonable price, and I'm often the beneficiary of her outings. I keep the scraps wrapped in plastic and frozen, pulling them out to flavor — you got it — collards.


I love collard greens cut into ribbons and sauteed with garlic (this takes 3 minutes, tops), but something about slow-cooked greens sits with me in a way that's tough to describe. Redolent of pork and chile pepper, these collards beg for a bottle of hot pepper vinegar and a warm piece of cornbread. 


Whichever cooking method you choose, be sure to remove the tough, woody stalks from the collard leaves before proceeding.


The following is my go-to, slow-cooked, collard recipe. Adjust according to taste. Substitute chicken stock for water if you want a more substantive dish.


Slow-Cooked Collard Greens
Serves 3-4 as a side dish

2 tablespoons olive oil
  • 1 onion, diced
  • 1 garlic clove, minced
  • 1/2 teaspoon hot red pepper flakes
  • 1/2 teaspoon kosher salt
  • 1 piece of country ham, about 2 x 2 inches
  • 1 pound collard greens
  • about 4 cups of water or chicken stock


Heat olive oil in a large saucepan over medium heat. Add onion and garlic and saute until tender, about 7 minutes. Add country ham scraps and cook for a few minutes more. Add collards and wilt. Sprinkle with hot red pepper flakes. Add a very small pinch of salt, water or chicken stock, and reduce heat to medium-low. Cook for about 1 hour, maybe a little more, until the greens are tender. Taste for seasoning and serve.